It’s not uncommon for users to forget their login passwords or have their system suffer a corrupt filesystem. When that happens, the recommended solution is to boot into rescue or emergency mode and apply the required fixes.
The rescue mode is also referred to as the single-user mode. As the name suggests, the rescue mode is used when you want to salvage your system from a system failure, for example, boot failure or reset a password. In rescue mode, all the local filesystems are mounted. However, only salient services are started. Normal services such as network services will not be started.
Emergency mode provides a minimal bootable environment and enables you to repair your Linux system even when rescue mode is not available. In emergency mode, only the root file system is mounted, and in read-only mode. Just as with rescue mode, only the essential services are activated in emergency mode.
In this guide, you will learn how to boot into rescue mode or emergency mode in Ubuntu 20.04 / 18.04.
Booting Ubuntu 20.04 in Rescue Mode
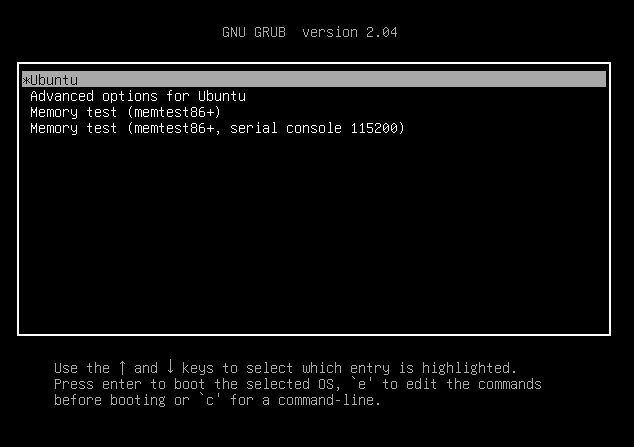
To get started, boot, or reboot your system. You will get the grub menu with options listed as shown. If you are running Ubuntu as a VM in VirtualBox, press the ESC button.
By default, the first option is selected. With the first option selected, press the ‘e’ key on the keyboard to access the grub parameters.
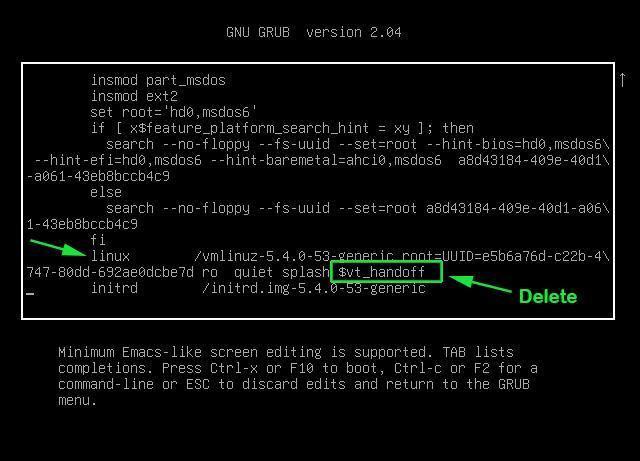
Scroll and locate the line that starts with ‘linux’. Go to the very end of the line by pressing ctrl + e and delete the string “$vt_handoff”.
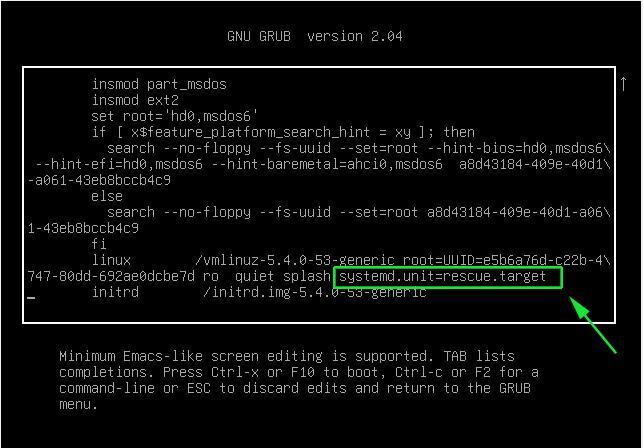
Next, append ‘systemd.unit=rescue.target’ at the end of the line.
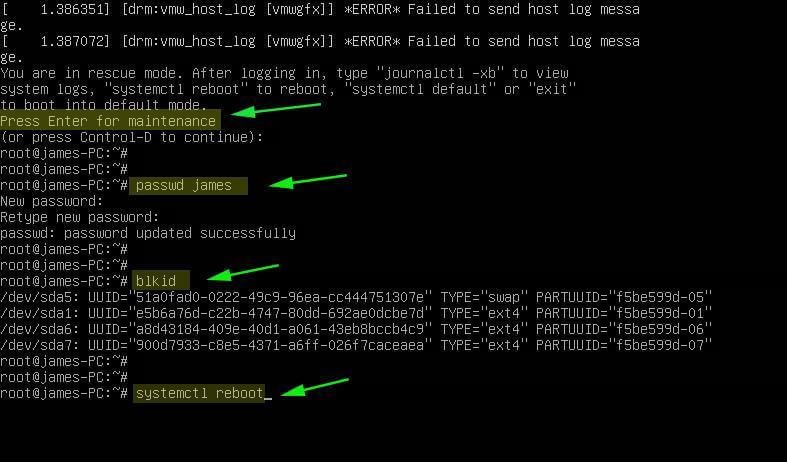
To boot the system into rescue mode, press ctrl + x. Proceed and press ENTER on your keyboard to gain access to the rescue mode. From there you can perform operations such as changing a user’s password. In the example below, I have managed to reset my password.
In rescue mode, all filesystems are mounted in read & write mode and you can run almost any commands just as you would in a normal session. Once you are done, reboot the system to save the changes using the command:
# passwd james
# blkid
# systemctl reboot
Booting Ubuntu 20.04 in Emergency Mode
As we mentioned earlier, in emergency mode, all files are mounted in read-only mode. The emergency mode comes in handy especially when it’s not possible to boot into rescue mode due to file system corruption.
To boot into emergency mode, reboot or boot your system. On the grub menu, ensure that the first option is highlighted and press the ‘e’ key on the keyboard to access the grub parameters.

Once again, navigate to the end of the line by pressing ctrl + e and delete the string “$vt_handoff”.

Next, append the ‘systemd.unit=emergency.target’ string at the end of the line.
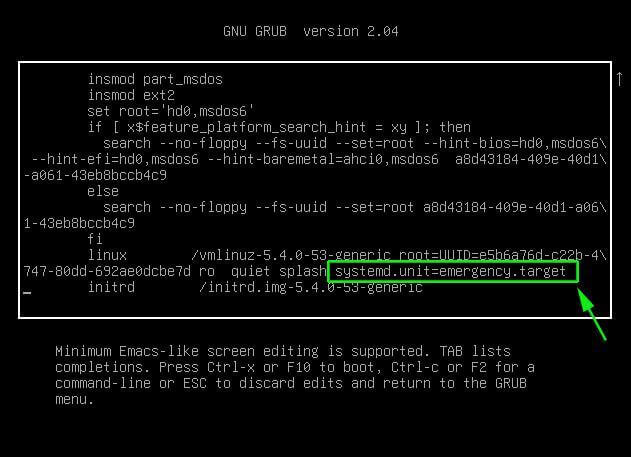
Thereafter, press ctrl + x to reboot into emergency mode. Hit ENTER to access the root filesystem. From here you can view various files on your Linux system. In this example, we are viewing the contents of the /etc/fstab to see the mount points that are defined.
# cat /etc/fstab
# mount -o remount,rw /
# passwd root
# systemctl reboot
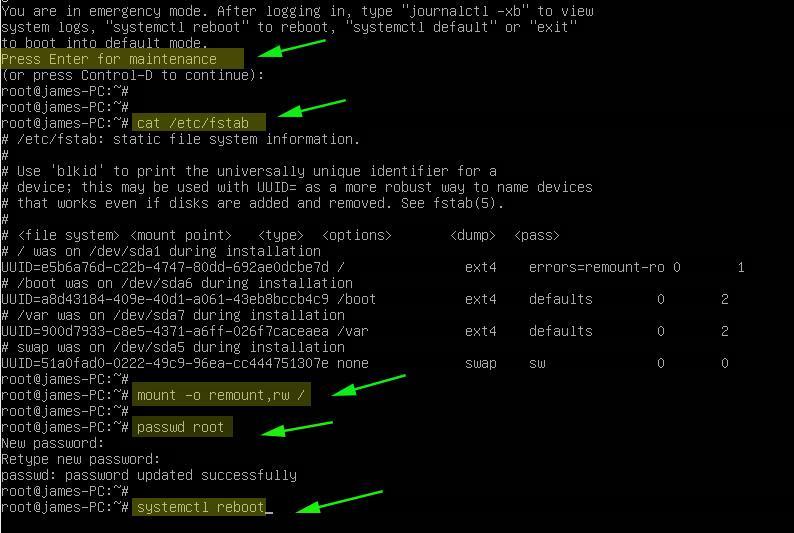
To make any changes to the system, you need to mount it in read and write mode as shown.
# mount -o remount,rw /
From here, you can perform any troubleshooting tasks such as changing the root password as shown. Once you are done, reboot for the changes to come into effect.
# systemctl reboot
This draws the curtain on this article. Hopefully, you can now access both the rescue and emergency mode and fix system issues in the Ubuntu system.
