NGINX web server (as reverse proxy) serves PHP applications through the FastCGI protocol (as a backend application server). NGINX employs PHP-FPM (FastCGI Process Manager), an alternative PHP FastCGI implementation that runs in the background as a daemon, listening for CGI requests. It comes with extra features designed for powering heavy-loaded websites or web applications, but it can be used for sites of any size.
Not only does PHP-FPM support configuration of FastCGI resource pools, but it also improves many of the FastCGI internals and increases error reporting, script termination, and much more. It features PHP daemonization, process management, dynamic number of processes from which requests can come from, error header, accelerated upload support, and more.
To accept FastCGI requests from NGINX, PHP-FPM can either listen on a TCP/IP socket or UNIX domain socket. Whichever address you choose to use is what NGINX uses to connect (proxy requests) to PHP-FPM, using the fastcgi_pass directive.
This guide explains how to configure NGINX to server PHP applications using PHP-FPM. It describes when to use a TCP/IP socket or UNIX domain socket to connect NGINX to PHP-FPM and why.
This guide assumes that you have NGINX and PHP-FPM installed on your Linux system, otherwise, see:
- How to Install LEMP Server on CentOS 8
- How to Install LEMP stack PhpMyAdmin in Ubuntu 20.04 Server
- How to Install NGINX, MySQL/MariaDB and PHP on RHEL 8
- How to Install LEMP on Debian 10 Server
What Should I Use: UNIX Domain Socket or TCP/IP Socket?
UNIX domain (or IPC) sockets are a means of inter-process communication (IPC) that allow efficient data exchange between processes running on the same operating system while TCP/IP (or Internet Domain) sockets allow processes to communicate over a network.
Unlike a TCP/IP socket that identifies a server by an IP address and port (e.g 127.0.0.1:9000), you can bind a server to a UNIX domain socket using a file pathname (e.g /run/php-fpm/www.sock), which is visible in the filesystem.
A UNIX domain socket is a special type of file – file and directory permissions apply to it (as is the case with any other type of UNIX file) and can be used to restrict which processes on the host can read and write to the file, (and thus communicate with the backend server).
This way, a UNIX domain socket is secure because only processes on the local host can use it. A TCP/IP socket may be exposed to the internet posing a security risk unless extra security measures such as a firewall are implemented.
Importantly, using a UNIX domain socket is not the same as using a TCP/IP socket regarding performance, several tests and benchmarks have proven UNIX domain sockets to be faster. The main drawback of UNIX domain sockets is that they are less scalable, they only support inter-process communication within the same operating system(OS).
Where Can I Configure PHP-FPM Listen Address?
You can configure the address PHP-FPM listens on in a resource pool configuration file. Note that with PHP-FPM, you can run several pools of processes with different settings. The default pool is called www.
The location of the resource pool configuration file depends on the way PHP and PHP-FPM are installed on a Linux system (whether its a default/single version or multiple versions simultaneously).
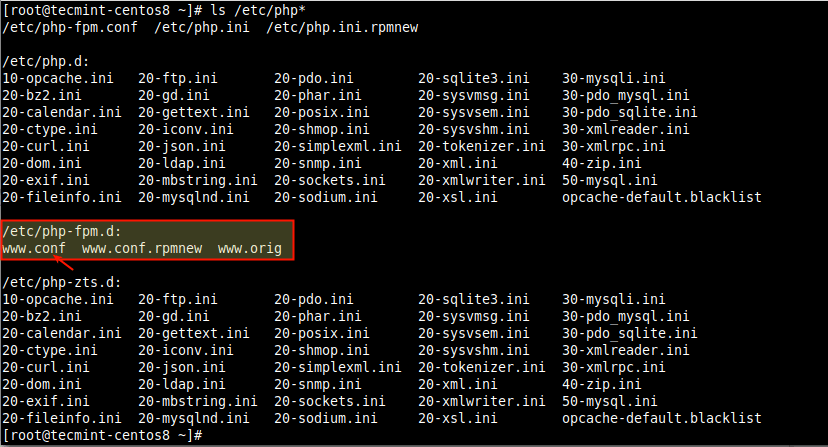
For example, on CentOS 8, with a single version, all PHP configuration files are located in the /etc directory and the default PHP-FPM pool (www) configuration file is /etc/php-fpm.d/www.conf:
To list all PHP configuration files, use the following ls command.
# ls /etc/php*
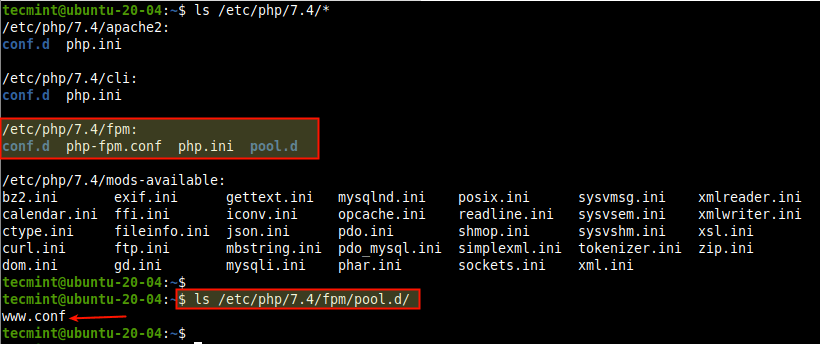
On Ubuntu 20.04, the PHP configuration files are located in the /etc/php/<php-version>/ directory and the default PHP-FPM pool (www) configuration file is /etc/php/<php-version>/fpm/pool.d/www.conf:
$ ls /etc/php/7.4/
Configuring PHP-FPM to Listen on a UNIX Domain Socket
To configure PHP-FPM to listen on a UNIX domain socket, open your default PHP-FPM pool configuration file, using your favorite text editor.
# vim /etc/php-fpm.d/www.conf			#Ubuntu/Debian
OR
$ sudo vim /etc/php/7.4/fpm/pool.d/www.conf	#CentOS/RHEL/Fedora
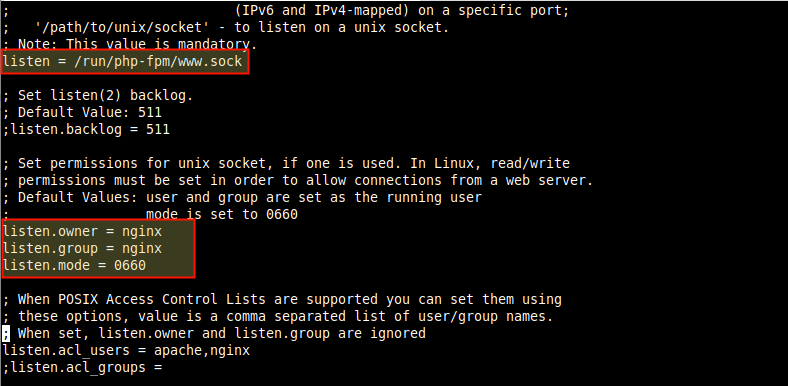
Then look for the listen directive and set it to the file pathname of the UNIX domain socket as follows. Note that most installations use a UNIX domain socket by default.
listen = /run/php/php7.4-fpm.sock	#Ubuntu/Debian
OR
listen = /run/php-fpm/www.sock		#CentOS/RHEL/Fedora
If you use a UNIX domain socket, you also need to set appropriate read/write permissions for the file, to allow connections from the NGINX web server. By default, NGINX runs as user and group nginx on CentOS/RHEL/Fedora and www-data on Ubuntu and Debian.
So, find the listen.owner and listen.group parameters and set them accordingly. Also, set the mode to 0660 using the listen.mode parameter.
------------- On Debian and Ubuntu -------------
listen.owner = www-data
listen.group = www-data
listen.mode = 0660

------------- On CentOS/RHEL and Fedora  -------------
listen.owner = nginx
listen.group = nginx
listen.mode = 0660
Note that if the permissions on the UNIX domain socket file are not set correctly, NGINX may return a bad gateway error.
Configuring PHP-FPM to Listen on a TCP/IP Socket
Although a UNIX domain socket is faster than a TCP/IP socket, the former is less scalable, because it can only support inter-process communication on the same OS. If NGINX and the backend application server (PHP-FPM) are running on different systems, you will have to configure PHP-FPM to listen on a TCP/IP socket for connections.
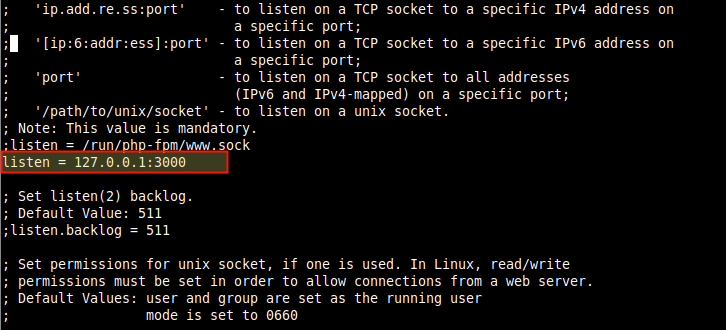
In the PHP-FPM pool configuration file, set the listen address as follows. Make sure that the port you have chosen is not being used by another process or service on the same system.
listen = 127.0.0.1:3000
Configuring NGINX to Work with PHP-FPM Application Server
Once you have configured the address PHP-FPM listens on, you need to configure NGINX to proxy request to it via that address, using the fastcgi_pass configuration parameter, in a virtual server block configuration file.
For example, if the configuration file for your website is /etc/nginx/conf.d/example.com.conf, open it for editing.
# vim /etc/nginx/conf.d/example.com.conf
Look for the location block for processing .php files and set the fastcgi_pass parameter as follows, if you configured PHP-FPM to listen on a UNIX domain socket.
fastcgi_pass unix:/run/php/php7.4-fpm.sock	#Ubuntu/Debian
OR
fastcgi_pass unix:/run/php-fpm/www.sock		#CentOS/RHEL/Fedora
Or use a TCP/IP address if you configured PHP-FPM to listen on a TCP/IP socket. If the backend application server (PHP-FPM) is running on a separate server (replace 10.42.0.10 with the IP address of the machine on which the PHP-FPM FastCGI server is running).
fastcgi_pass 10.42.0.10:3000;
Important: On CentOS 8, PHP-FPM is defined as an upstream server in the /etc/nginx/conf.d/php-fpm.conf file, within an upstream block, with the name php-fpm.
You can make changes here accordingly depending on the address PHP-FPM is configured to listen on, in the pool configuration file. The default configuration points to a UNIX domain socket.
upstream php-fpm {
        server unix:/run/php-fpm/www.sock;
}
and in your site’s server block file, simply set the fastcgi_pass parameter as shown.
fastcgi_pass php-fpm;
After making changes to the PHP-FPM and NGINX configurations, check their configuration syntax for correctness as follows.
------------- On Debian and Ubuntu -------------
$ sudo php-fpm -t
$ sudo nginx -t

------------- On CentOS/RHEL and Fedora  -------------
# php-fpm -t
# nginx -t
While the command output shows the main configuration file only, all the other configuration files are included and checked as well.
Next, you need to restart the two services to apply the changes, using the systemctl command.
------------- On Debian and Ubuntu -------------
$ sudo systemctl restart nginx
$ sudo systemctl restart php7.4-fpm

------------- On CentOS/RHEL and Fedora  -------------
# systemctl restart nginx
# systemctl restart php-fpm
If you get any errors, you can check the NGINX and PHP-FPM log files using the cat command.
------------- On Debian and Ubuntu -------------
$ cat /var/log/nginx/error.log
$ cat /var/log/php7.4-fpm.log

------------- On CentOS/RHEL and Fedora  -------------
$ cat /var/log/nginx/error.log
$ cat /var/log/php-fpm/www-error.log
That’s all we had for you. The comment section below can be used to ask questions. For more information, see the NGINX documentation and PHP-FPM documentation.


