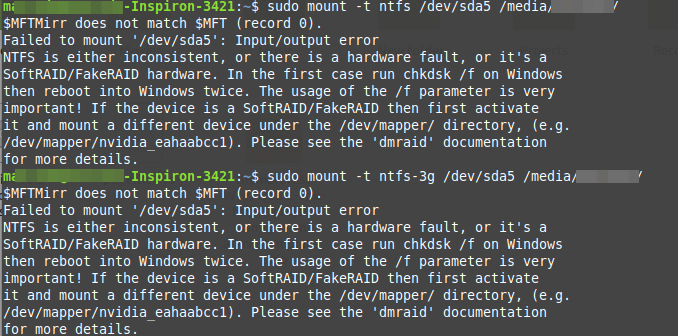
In this article, we will show how to fix NTFS failed to mount errors such as “Failed to mount ‘/dev/sdax’: Input/output error, NTFS is either inconsistent, or there is a hardware fault, or it’s a SoftRAID/FakeRAID hardware”.
The following screenshot shows an example of an NTFS failed to mount error.

To fix this error, you can use ntfsfix, a tiny and useful utility that fixes some common NTFS problems. A ntfsfix is part of the ntfs-3g package (an open-source implementation of NTFS) and it repairs several fundamental NTFS inconsistencies, resets the NTFS journal file, and schedules an NTFS consistency check for the first boot into Windows.
To run it on our computer, you need to install the ntfs-3g package as follows.
----------- On Debian, Ubuntu & Mint -----------
$ sudo apt-get install ntfs-3g

----------- On RHEL, CentOS & Fedora -----------
$ sudo yum install epel-release
$ sudo yum install ntfs-3g
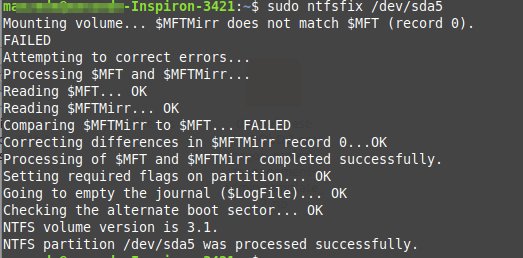
Once you have the ntfs-3g package installed, run the ntfsfix command, provide the NTFS partition that has issues as an argument as shown.
$ sudo ntfsfix /dev/sda5

To perform a dry-run where ntfsfix doesn’t write anything but only shows what would have been done, use the -n or --no-action option.
$ sudo ntfsfix -n /dev/sda5
A ntfsfix has another useful switch -b or --clear-bad-sectors for clearing the list of bad sectors. This feature is particularly useful after cloning an old disk with bad sectors to a new disk.
$ sudo ntfsfix -b /dev/sda5
Also, ntfsfix supports clearing the volume dirty flag if the volume can be fixed and mounted. You can invoke this feature bypassing the -d option as shown.
$ sudo ntfsfix -d /dev/sda5
A nftsfix is a useful tool for fixing some common NTFS problems. For any questions or comments, reach us via the feedback form below.
