A recursive acronym for PHP HyperText Preprocessor, PHP is an open-source and widely used server-side scripting language for developing static and dynamic websites. It is the core of most blogging systems such as WordPress, Drupal, Magento, and business platforms such as Akaunting.
PHP 7.x came into the picture in 2015 with the release of PHP 7.0.0. This has seen the release of several versions since then.
At the time of writing this tutorial, the only supported release is PHP 7.4 in the 7 series. The latest PHP 8 comes with tons of new features, functions, and deprecations as compared to PHP 7.
[ You might also like: How to Install Latest PHP 8.0 on Rocky Linux 8 ]
In this guide, we will focus on how to install PHP 7.4 on Rocky Linux 8.
Step 1: Check PHP Installation in Rocky Linux
We will start off by checking if PHP is installed. To do so, execute the command below. Evidently, PHP is not installed by default as shown.
$ php -v

Thankfully, Rocky Linux AppStream repositories provide PHP versions from PHP 7.2 which is enabled by default. To get a list of all the hosted PHP modules, run the command.
$ sudo dnf module list php
The output clearly shows that the default module is PHP 7.2 with the [d] tag.

Step 2: Install PHP 7.4 in Rocky Linux
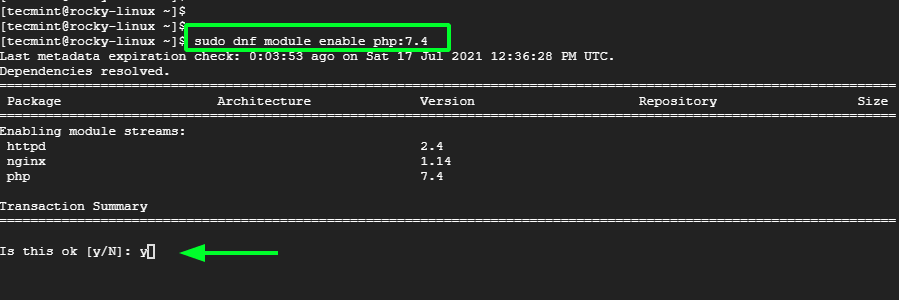
To install PHP 7.4, first enable the module as provided.
$ sudo dnf module enable php:7.4

NOTE: To enable a different module, simply replace 7.4 with the preferred version. For example, to enable 7.3 run:
$ sudo dnf module enable php:7.3
Once installed, install PHP and associated PHP extensions (php-extension_name) as indicated. The PHP extensions installed in this example are as shown.
$ sudo dnf install php php-cli php-gd php-curl php-zip php-mbstring

Step 3: Verify the Version of PHP Installed
Once the installation is complete, verify the version of PHP installed.
$ php -v

The output above confirms that we have successfully installed PHP 7.4. And that’s all there is to installing PHP 7.4. Your feedback is most welcome.
