Ubuntu Server 20.04, also named Focal Fossa, has been released by Canonical and it’s now ready for installation. This article will walk you through the process of installing Ubuntu 20.04 Server Edition with Long Time Support on your machine.
If you’re looking for a fresh desktop installation or server up-gradation, then read our previous articles: Installation of Ubuntu 20.04 Desktop and How to Upgrade to Ubuntu 20.04.
Download Ubuntu 20.04 ISO Image
Use the following link to download the Ubuntu 20.04 live server install ISO image, which is provided only for 64-bit systems.
After downloading the ISO image, you need to create a bootable DVD using Rufus tool or a bootable USB drive using the Unetbootin LiveUSB Creator.
Install Ubuntu 20.04 Server Edition
1. To kickstart the installation process, place the bootable CD/DVD into a drive or USB in a port on your machine. Then boot from it by pressing your computer’s boot key (which should be one of F9, F10, F11, or F12 depending on the manufacturer settings).
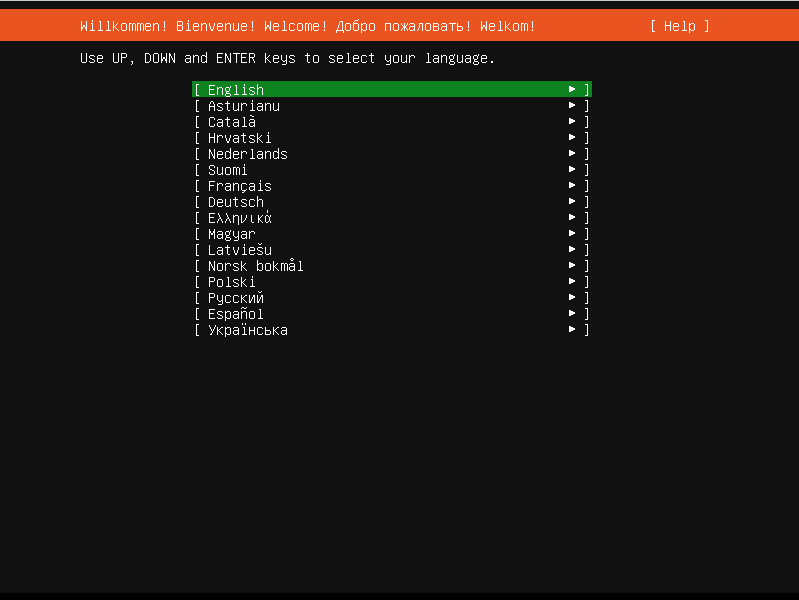
Once the system has booted, you will land on the installer welcome interface shown in the following screenshot asking you to select the installation language. Press Enter to continue.
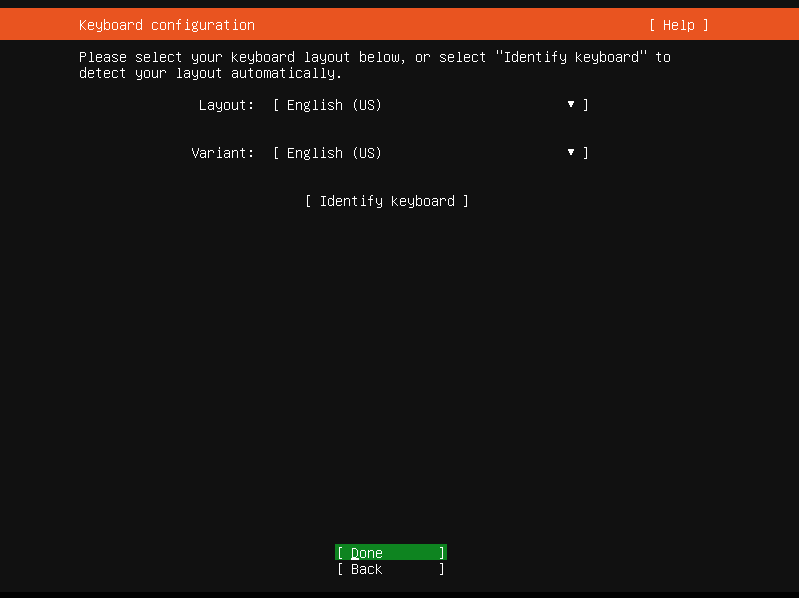
2. Next, select your keyboard layout and press Enter to proceed.
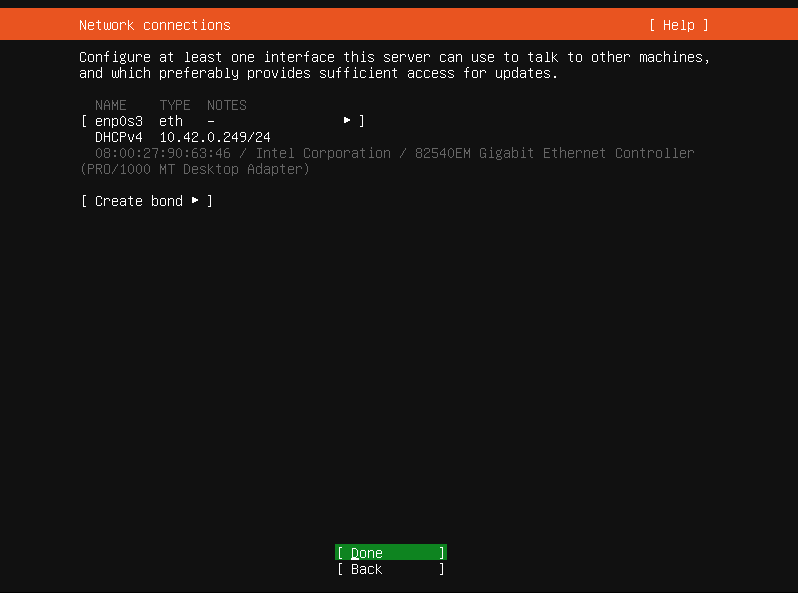
3. If your system is connected to a network, it should receive an IP address from your DHCP server. Press Done to continue.
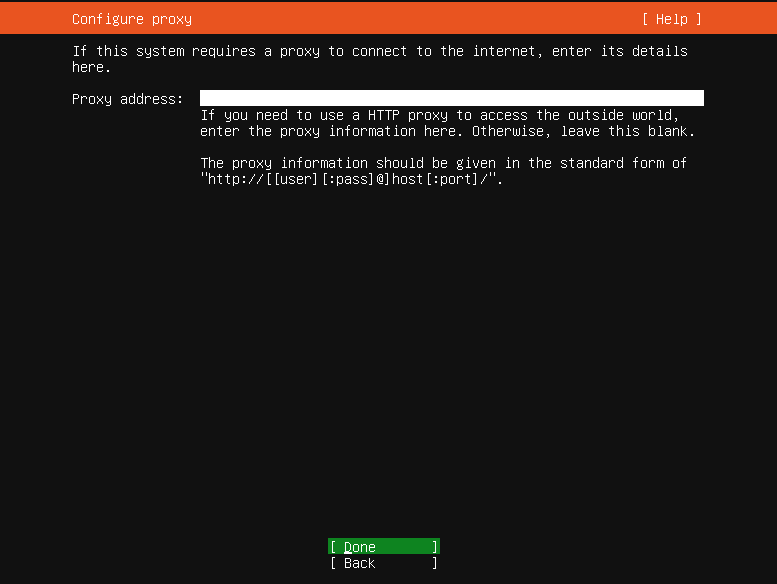
4. Based on your network set up, if you need a proxy server to connect to the internet, enter its details here. Otherwise, leave it empty and press Done.
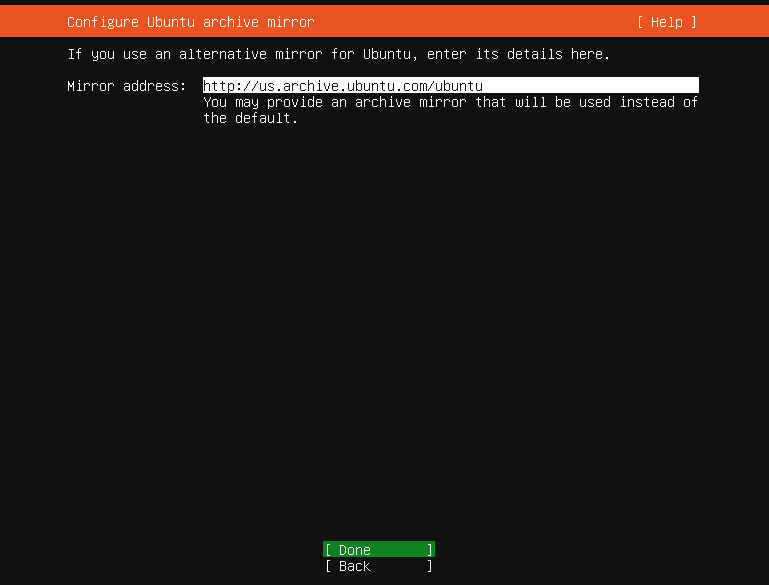
5. Next, you need to configure the Ubuntu archive mirror. The installer will select it automatically based on your country. Press Done to proceed.
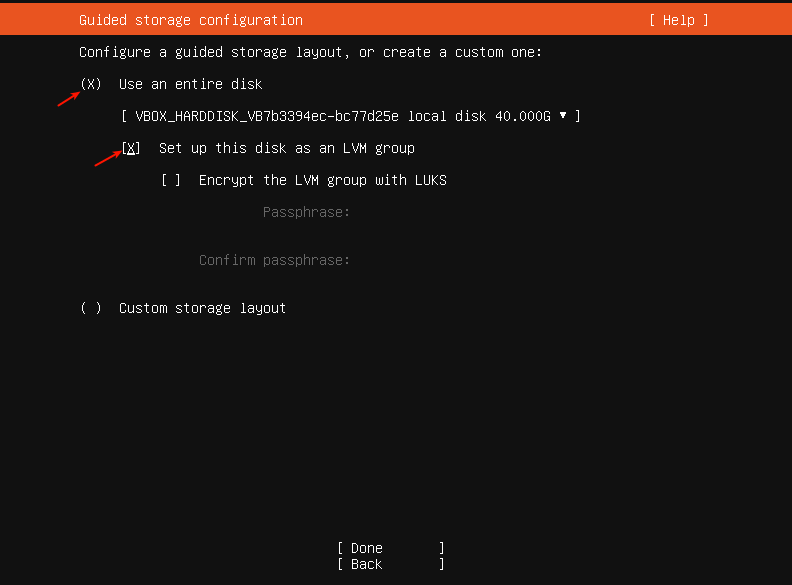
6. Now its time to configure your storage. You need to create the storage layout as explained below. For this guide, we will show how to do this manually, therefore, go to Use an entire disk and then select check the option Set up this disk as an LVM group.
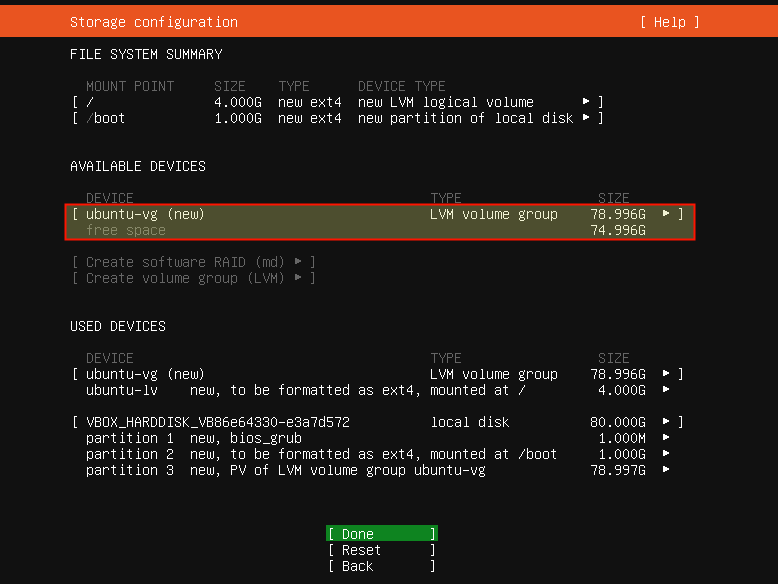
Note that the installer will create the root partition (with a small size by default), then you can manually edit its sizes and also create a swap partition.
The following screenshot shows the default file system summary. Our test machine has a total of 80 GB hard disk capacity.
Creating/Editing Root Partition Size
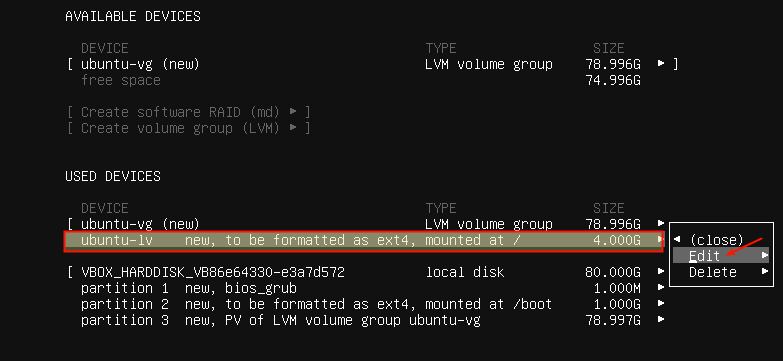
7. Next, under USED DEVICES, scroll to the root partition and press enter to get partitioning options. Select Edit as shown in the following screenshot, and press Enter.
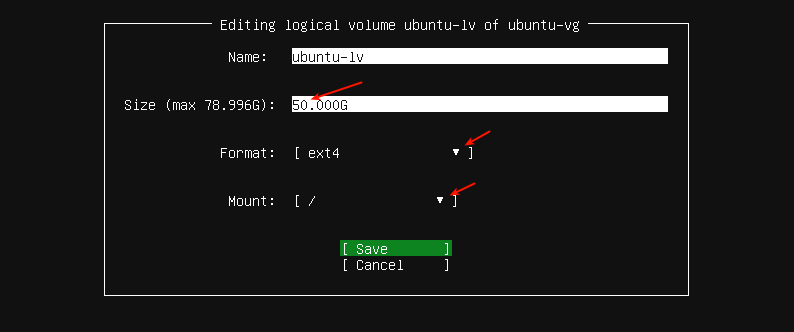
8. Then edit the partition size as shown in the following screenshot. For example, set it to 50GB and scroll down or use tab to go to Save and press Enter.
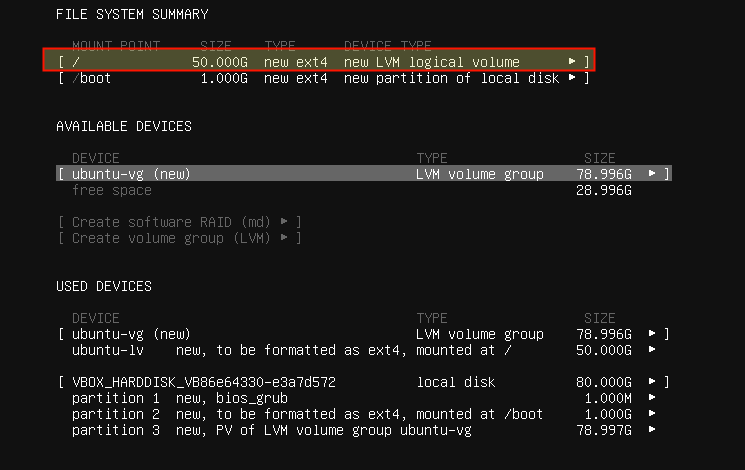
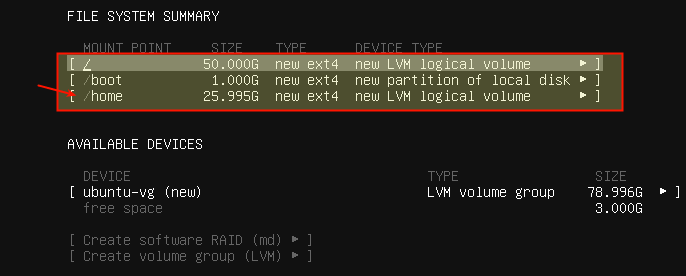
9. Now the root partition should have a size amounting to what you specified while editing it, as highlighted in the following screenshot.
Note: If you do not want to create a separate /home partition, skip the next step, head over to create a swap partition.
Creating a Separate /home Partition
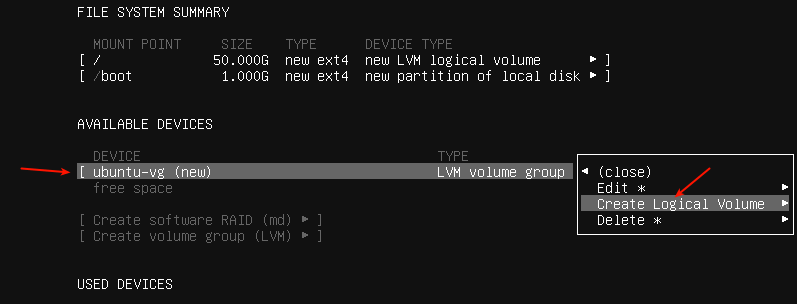
10. Next, you need to create a home partition for storing user files. Under AVAILABLE DEVICES, select the LVM volume group and press Enter. In the partitioning options, scroll down to Create Logical Volume.
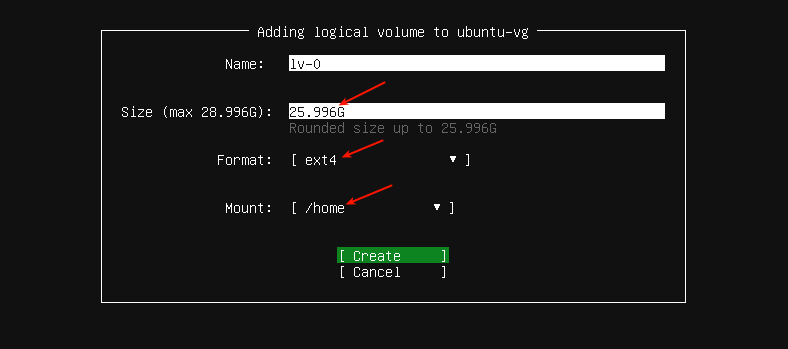
11. Next, enter the home partition size. Set it appropriately so that you leave some space for a swap partition/area. Under Format, select ext4 and Mount should be /home as highlighted in the following screenshot. Then scroll down to Create and press Enter.
The /home file system has been created successfully.
Creating a Swap Partition
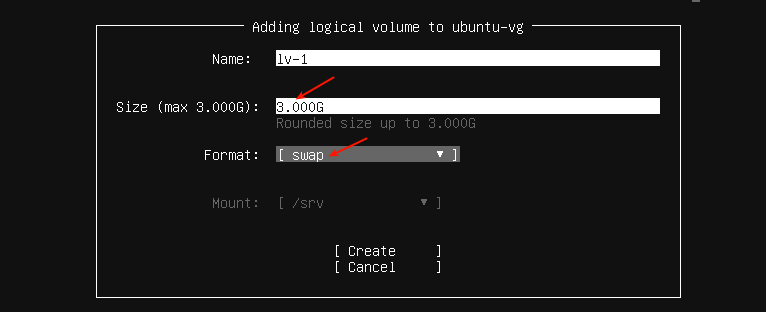
12. Now you need to create a swap partition. Under AVAILABLE DEVICES, select the LVM volume group and press Enter. In the partitioning options, scroll down to Create Logical Volume.
13. Then edit the partition size and set the Format field to swap as highlighted in the following screenshot and press Enter.
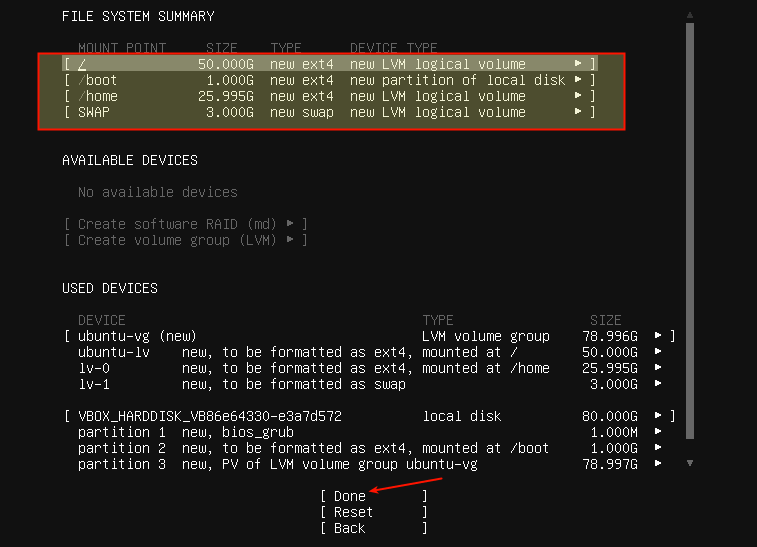
14. Your new file system summary should now have a /boot, /root, /home, and swap partition as shown in the following screenshot. To write the changes to the harddisk, scroll down to Done, and press Enter.
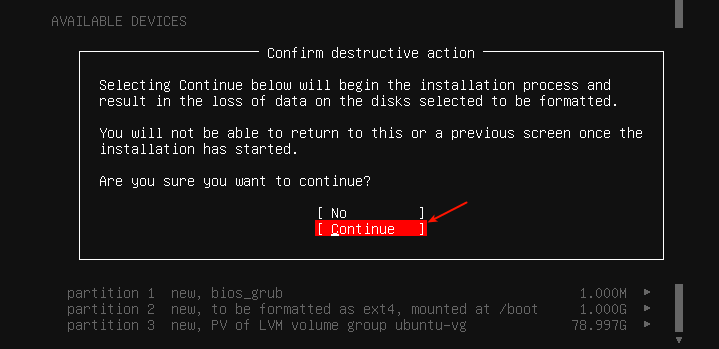
15. Confirm the action by selecting Continue and press Enter.
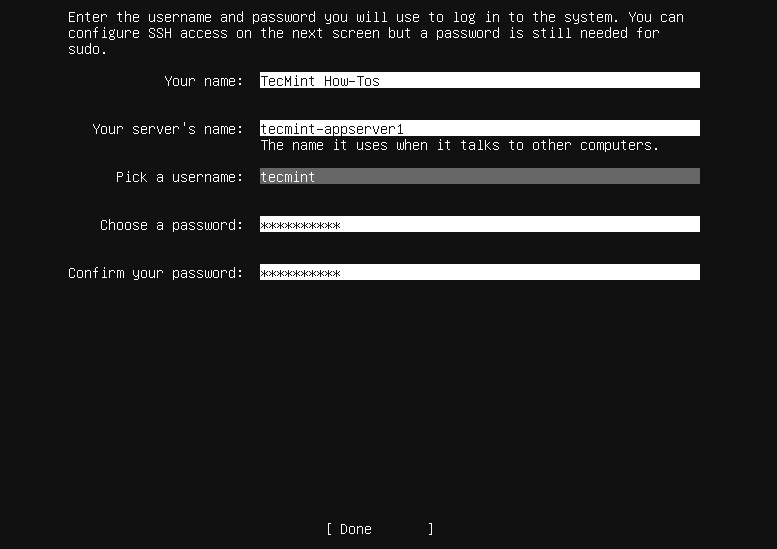
16. Now create a user profile by mentioning your name, server’s name, username, and a secure and strong password. Then scroll to Done and press Enter.
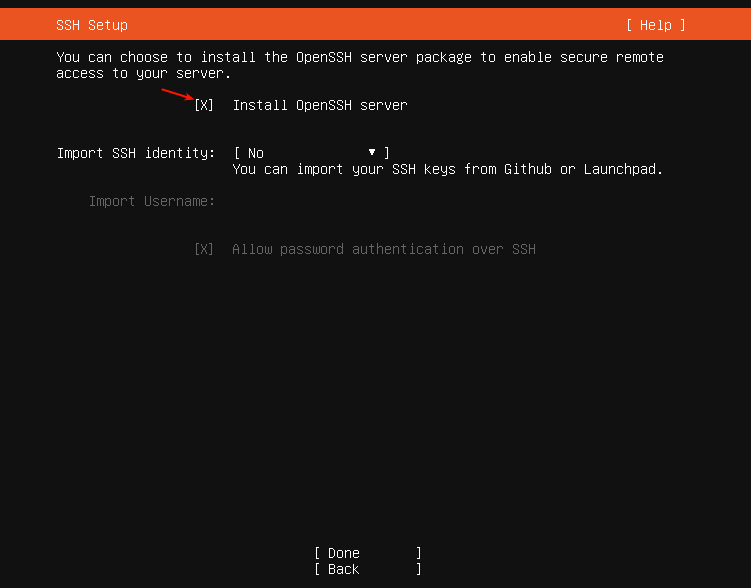
17. Next, the installer will prompt you to install the OpenSSH package for remote access. Use space to choose that option. Then scroll down to Done and press Enter.
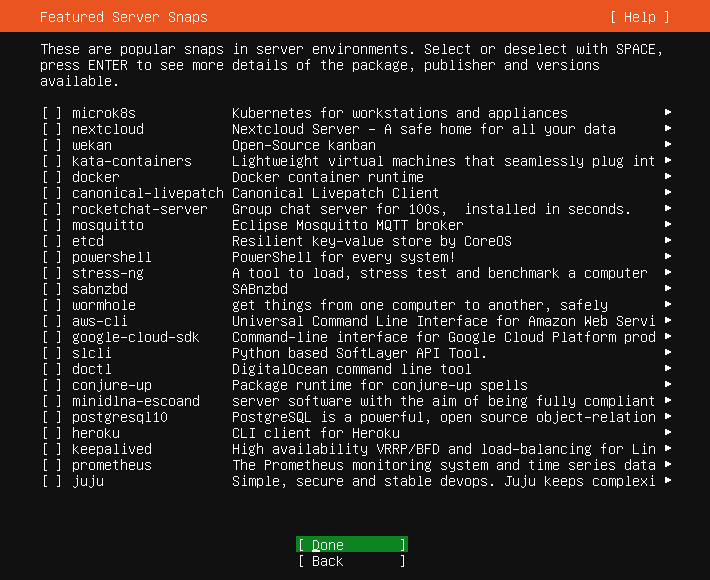
18. If you want to install some snaps, select them from the provided list. Use the space bar to select a snap. Then go to Done and press Enter.
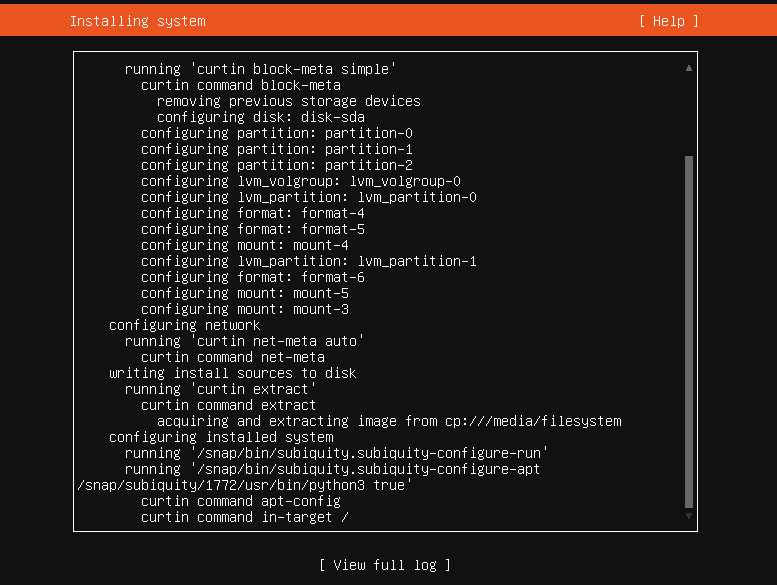
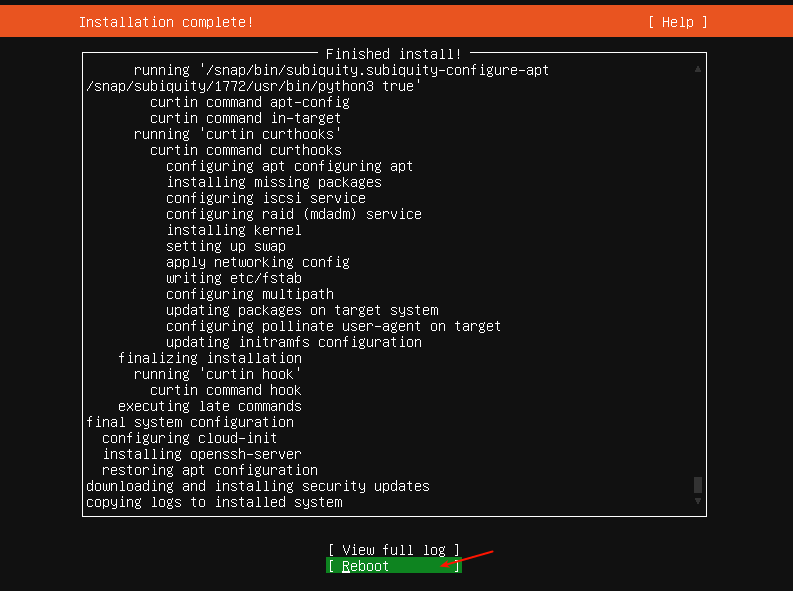
19. The installation process should now start as shown in the following screenshot. Once it is done, press Enter to reboot the system.
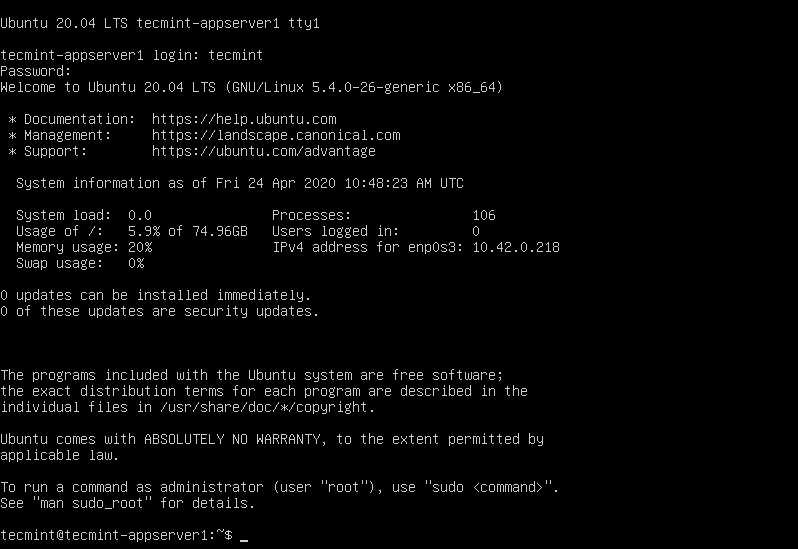
20. After a reboot, you can now log into your new Ubuntu 20.04 LTS server as shown in the following screenshot.
That’s all friends! You have successfully installed Ubuntu 20.04 LTS server edition on your machine. You can leave a comment concerning this guide via the feedback form below.

