Logo
  • Ubuntu
  • CentOS
  • Debian
  • Fedora
  • RedHat

How to Manage Virtual Machines in KVM Using Virt-Manager - DesignLinux

Jan 08 2021
designlinux 0 Comments

The virt-manager application provides an easy-to-use interface that allows users to perform a wide range of tasks including creating guest machines and assigning critical virtual resources such as CPU, memory, and disk space. Users can also configure networking, pause, and resume the guest machines as well as monitor performance.

As you get started, make sure that the KVM hypervisor is installed and guest virtual machines created on the system using virt-manager.

We have elaborate articles on:

  • How to Install KVM on Ubuntu 20.04
  • How to Install KVM on CentOS 8 / RHEL 8
  • How to Create Virtual Machines in KVM Using Virt-Manager

Without much further ado, let’s focus on how you can manage KVM virtual machines using virt-manager in Linux.

Managing the Virtual Machine using Virt-Manager

Once the installation of the guest OS is complete. It should appear on virt-manager in a ‘Running’ state as shown.
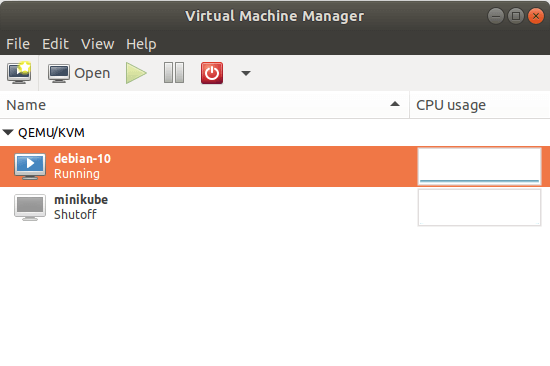
Running KVM Virtual Machines

To display the virtual hardware details, click on the ‘Edit’ button on the menu bar, and select ‘Virtual machine details’.
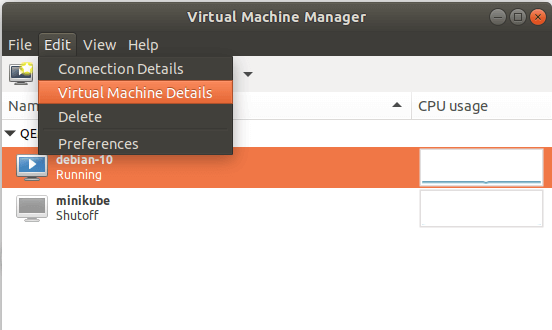
Check Virtual Machine Hardware

On the guest machine window, click on the blue ‘Show virtual hardware details’ icon.
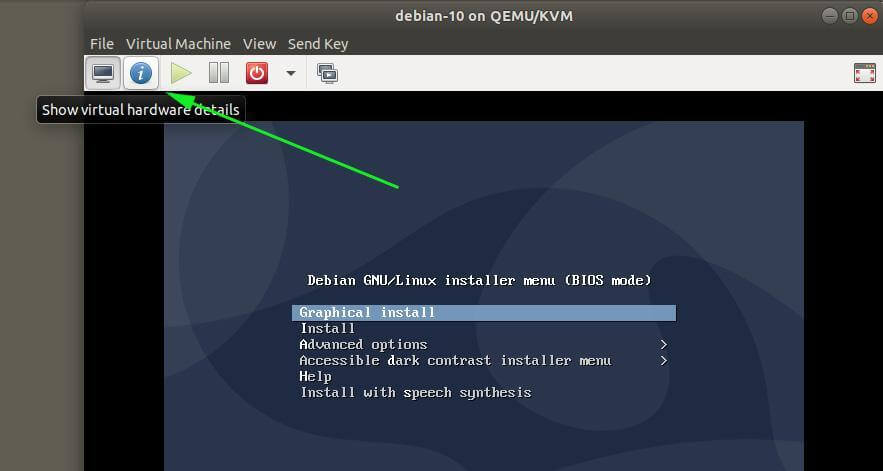
Show Virtual Machine Hardware Details

The window gives you an overview of the available virtual hardware properties associated with the VM. These include the virtual CPUs, RAM, network cards and so much more.

In addition, you can perform some tweaks, for example, adding hardware resources such as a USB drive. To achieve this, ensure that you have plugged in a USB drive and click on the ‘Add hardware’ button.
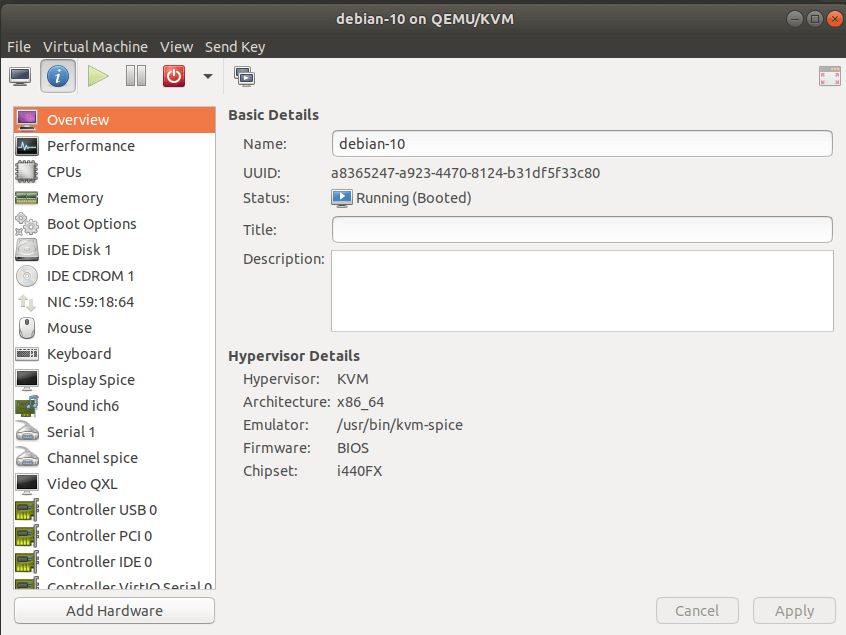
VM Hardware Overview

Navigate and click on the ‘USB Host device’ button, and on the right pane, select your USB device. In my case, I have selected the ‘SanDisk Cruzer Blade’ USB stick. Then click ‘Finish’.
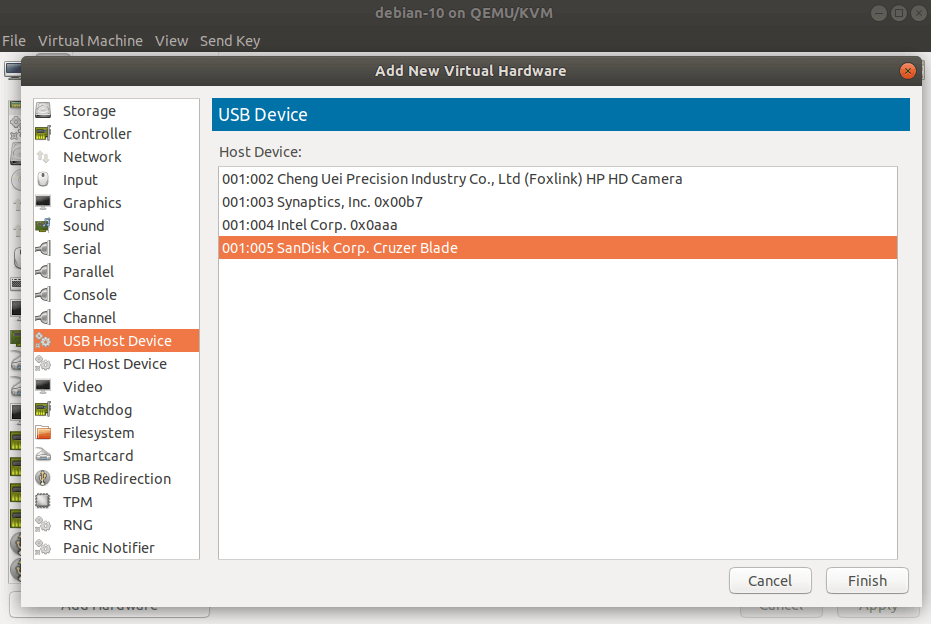
Add USB Device to VM

Just below the menu bar, the virt-manager presents some options for controlling the state of the virtual machine. For example, to access the virtual machine console hit the ‘Open’ button.

Open VM Console
Open VM Console

To pause the virtual machine, click on the ‘Pause’ button.

The poweroff button presents an array of options including Reboot, Shut Down, Force Reset, Force Off, and Save.
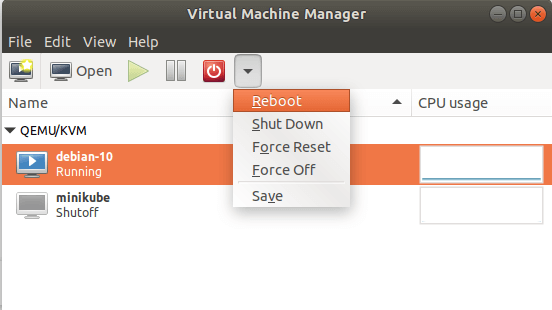
Manage KVM Virtual Machines

Clone KVM Virtual Machine

Also, just like VirtualBox, you can clone a VM by right-clicking and selecting the ‘Clone’ option. This creates a new, independent copy of the original disk.
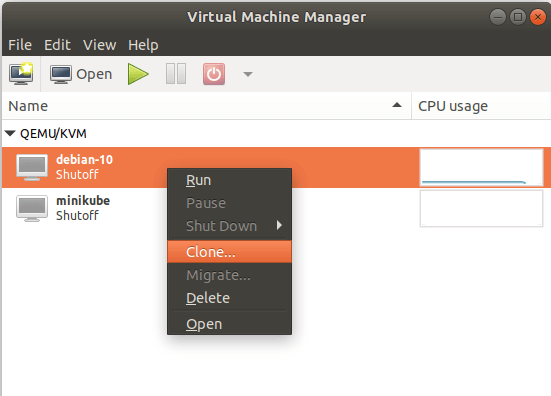
Clone KVM Virtual Machine

Feel free to configure other options such as networking and storage, and when you are done, click on the ‘Clone’ option.
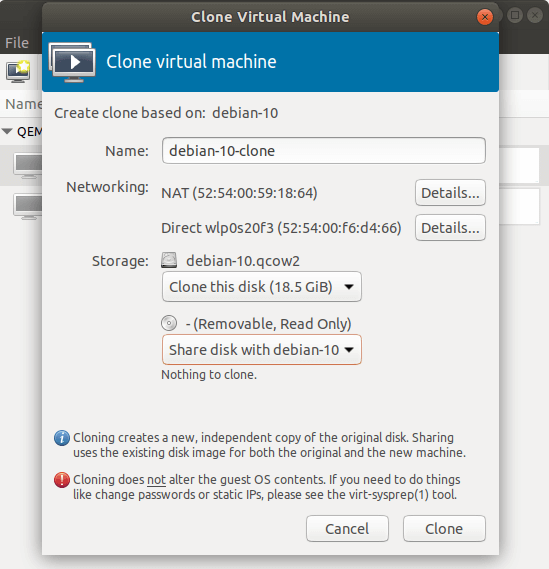
Clone Virtual Machine Settings

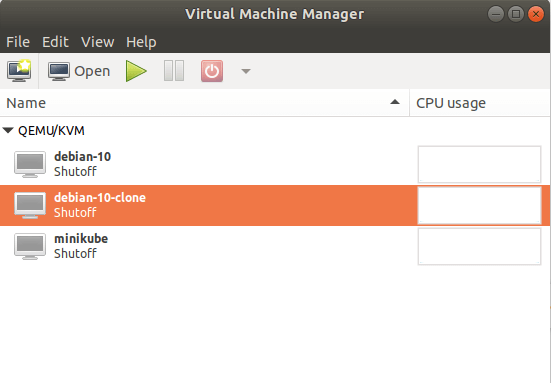
The clone VM will appear as shown.

Virtual Machine Clone

And that’s pretty much it. There are plenty of other options that virt-manager provides that might pique your curiosity. So, feel free to explore. Hopefully, you have a decent idea of how to create and manage your virtual machines using KVM. Alternatively, you can also use the Cockpit web console to manage KVM virtual machines.

Source: access.redhat.com

Related

Tags: CentOS Tips, KVM Tips, Ubuntu Tips

How to Install Apache CouchDB in Ubuntu 20.04

Prev Post

How to Create Virtual Machines in KVM Using Virt-Manager

Next Post
Archives
  • January 2023
  • December 2022
  • November 2022
  • October 2022
  • September 2022
  • July 2022
  • June 2022
  • April 2022
  • March 2022
  • February 2022
  • January 2022
  • December 2021
  • November 2021
  • October 2021
  • September 2021
  • August 2021
  • July 2021
  • June 2021
  • May 2021
  • April 2021
  • March 2021
  • February 2021
  • January 2021
  • December 2020
  • November 2020
  • October 2020
  • September 2020
  • August 2020
  • July 2020
  • June 2020
  • May 2020
Categories
  • AlmaLinux
  • Android
  • Ansible
  • Apache
  • Arch Linux
  • AWS
  • Backups
  • Bash Shell
  • Bodhi Linux
  • CentOS
  • CentOS Stream
  • Chef
  • Cloud Software
  • CMS
  • Commandline Tools
  • Control Panels
  • CouchDB
  • Data Recovery Tools
  • Databases
  • Debian
  • Deepin Linux
  • Desktops
  • Development Tools
  • Docker
  • Download Managers
  • Drupal
  • Editors
  • Elementary OS
  • Encryption Tools
  • Fedora
  • Firewalls
  • FreeBSD
  • FTP
  • GIMP
  • Git
  • Hadoop
  • HAProxy
  • Java
  • Jenkins
  • Joomla
  • Kali Linux
  • KDE
  • Kubernetes
  • KVM
  • Laravel
  • Let's Encrypt
  • LFCA
  • Linux Certifications
  • Linux Commands
  • Linux Desktop
  • Linux Distros
  • Linux IDE
  • Linux Mint
  • Linux Talks
  • Lubuntu
  • LXC
  • Mail Server
  • Manjaro
  • MariaDB
  • MongoDB
  • Monitoring Tools
  • MySQL
  • Network
  • Networking Commands
  • NFS
  • Nginx
  • Nodejs
  • NTP
  • Open Source
  • OpenSUSE
  • Oracle Linux
  • Package Managers
  • Pentoo
  • PHP
  • Podman
  • Postfix Mail Server
  • PostgreSQL
  • Python
  • Questions
  • RedHat
  • Redis Server
  • Rocky Linux
  • Security
  • Shell Scripting
  • SQLite
  • SSH
  • Storage
  • Suse
  • Terminals
  • Text Editors
  • Top Tools
  • Torrent Clients
  • Tutorial
  • Ubuntu
  • Udemy Courses
  • Uncategorized
  • VirtualBox
  • Virtualization
  • VMware
  • VPN
  • VSCode Editor
  • Web Browsers
  • Web Design
  • Web Hosting
  • Web Servers
  • Webmin
  • Windows
  • Windows Subsystem
  • WordPress
  • Zabbix
  • Zentyal
  • Zorin OS
Visits
  • 0
  • 259
  • 614,631

DesignLinux.com © All rights reserved

Go to mobile version