Logo
  • Ubuntu
  • CentOS
  • Debian
  • Fedora
  • RedHat

How to Monitor Apache Performance Using mod_status in Ubuntu - DesignLinux

Sep 28 2020
designlinux 0 Comments

While you can always have a peek at Apache log files to get information about your webserver such as active connections, you can get a very detailed overview of your web server’s performance by enabling the mod_status module.

What is the mod_status module?

The mod_status module is an Apache module that allows users to access highly detailed information about Apache’s performance on a plain HTML page. In fact, Apache maintains its own server status page for general public viewing.

You can view status for Apache (Ubuntu) by heading over to the address below:
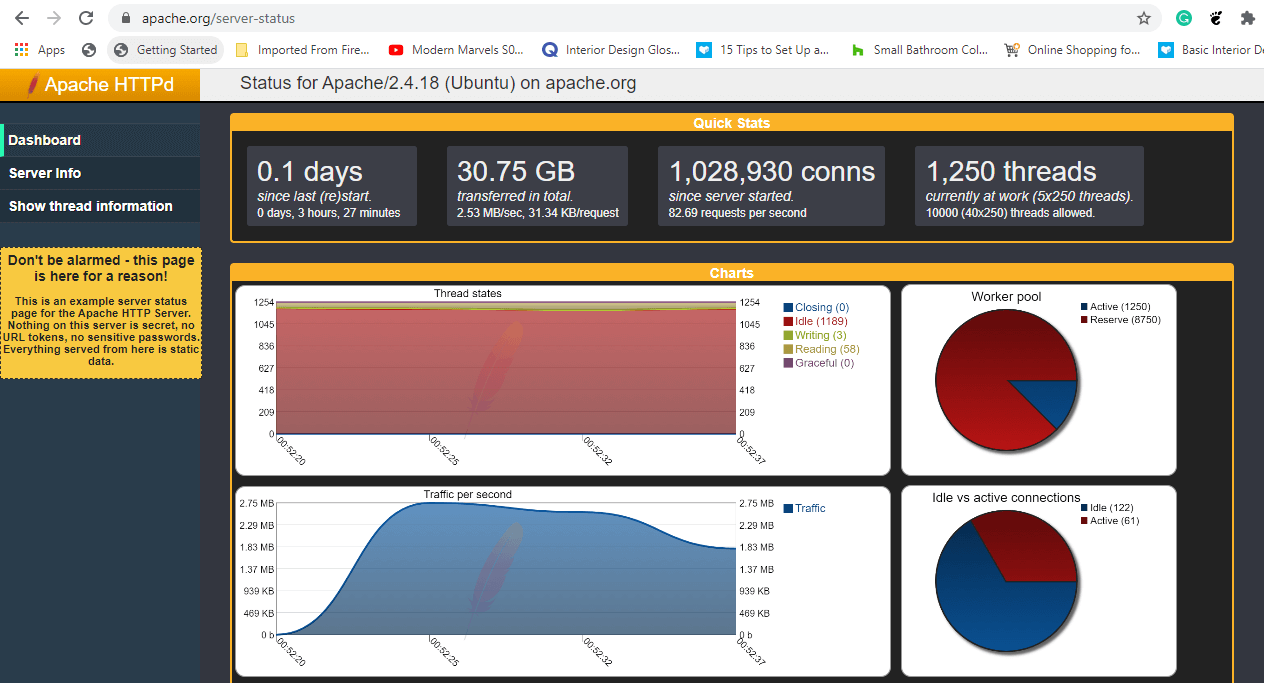
  • https://apache.org/server-status
Check Apache Performance Status

The Apache mod_status makes it possible to serve a plain HTML page containing information such as:

  • Server version
  • Current day and time in UTC
  • Server Uptime
  • Server load
  • Total traffic
  • Total number of incoming requests
  • The webserver’s CPU usage
  • PIDs with the respective clients and so much more.

Let’s now shift gears and see how you can get up-to-date statistics about Apache web server.

Testing Environment

Operating System: 	Ubuntu 20.04
Application:            Apache HTTP server
Version:                2.4.41
IP address:             34.123.9.111
Document root:          /var/www/html

Enable mod_status in Apache Ubuntu

By default, Apache ships with the mod_status module already enabled. You can verify this by checking the mods_enabled directory by running ls command as shown:

$ ls /etc/apache2/mods-enabled
Check mod_status Module in Apache Ubuntu

Ensure that the status.conf and status.load files are present. If not, you need to enable mod_status module by invoking the command:

$ sudo /usr/sbin/a2enmod status

Configure mod_status in Apache Ubuntu

As stated earlier, the mod_status is already enabled. However, additional tweaks are required for you to access the server-status page. To do so, you need to modify the status.conf file.

$ sudo vim /etc/apache2/mods-enabled/status.conf 

Set the Require ip directive to reflect the IP address of the machine that you will be accessing the server from.

Configure mod_status Module in Apache Ubuntu

Save the changes and restart Apache for the changes to take effect to confirm the status as shown:

$ sudo systemctl restart apache2

Then verify the status of Apache and ensure it up and running.

$ sudo systemctl status apache2
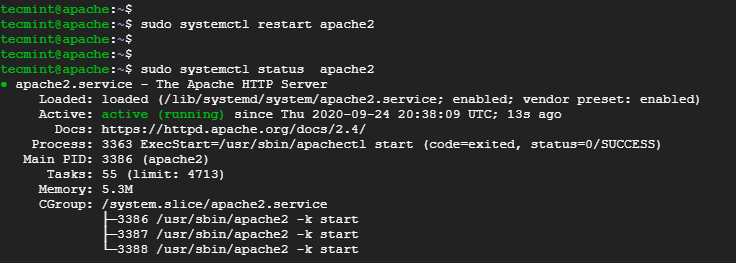
Check Apache Status in Ubuntu

Thereafter, browse the web server’s URL as shown.

http://server-ip/server-status

You will get a status HTML page displaying a host of Apache’s information and an array of statistics as shown.
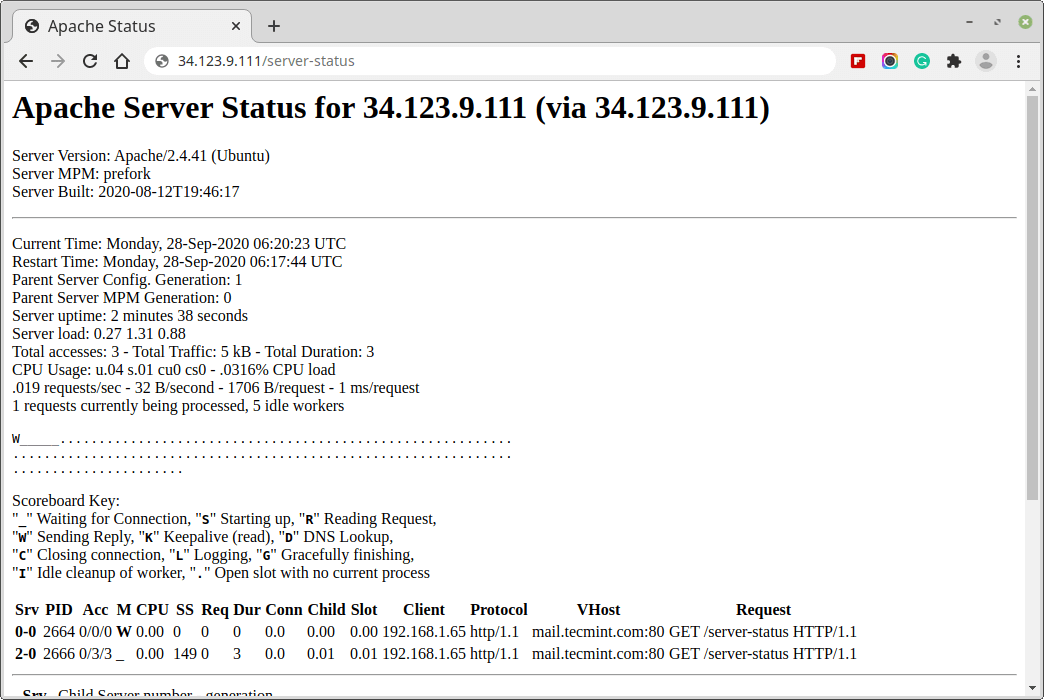
Monitor Apache Ubuntu Performance

NOTE: To have the page refresh after every a given time interval, for example, 5 seconds, append the “?refresh=5” at the end of the URL.

http://server-ip/server-status?refresh=5

This provides a better monitoring capacity of your server’s performance than the plain static HTML page earlier on.

That’s all for now about the mod_status module. Stay Tuned to Tecmint for so much more.

Related

Tags: Apache Tips, Ubuntu Tips

How to Install Roundcube Webmail on CentOS/RHEL 8/7

Prev Post

How to Kill a Process in Linux Systems

Next Post
Archives
  • January 2023
  • December 2022
  • November 2022
  • October 2022
  • September 2022
  • July 2022
  • June 2022
  • April 2022
  • March 2022
  • February 2022
  • January 2022
  • December 2021
  • November 2021
  • October 2021
  • September 2021
  • August 2021
  • July 2021
  • June 2021
  • May 2021
  • April 2021
  • March 2021
  • February 2021
  • January 2021
  • December 2020
  • November 2020
  • October 2020
  • September 2020
  • August 2020
  • July 2020
  • June 2020
  • May 2020
Categories
  • AlmaLinux
  • Android
  • Ansible
  • Apache
  • Arch Linux
  • AWS
  • Backups
  • Bash Shell
  • Bodhi Linux
  • CentOS
  • CentOS Stream
  • Chef
  • Cloud Software
  • CMS
  • Commandline Tools
  • Control Panels
  • CouchDB
  • Data Recovery Tools
  • Databases
  • Debian
  • Deepin Linux
  • Desktops
  • Development Tools
  • Docker
  • Download Managers
  • Drupal
  • Editors
  • Elementary OS
  • Encryption Tools
  • Fedora
  • Firewalls
  • FreeBSD
  • FTP
  • GIMP
  • Git
  • Hadoop
  • HAProxy
  • Java
  • Jenkins
  • Joomla
  • Kali Linux
  • KDE
  • Kubernetes
  • KVM
  • Laravel
  • Let's Encrypt
  • LFCA
  • Linux Certifications
  • Linux Commands
  • Linux Desktop
  • Linux Distros
  • Linux IDE
  • Linux Mint
  • Linux Talks
  • Lubuntu
  • LXC
  • Mail Server
  • Manjaro
  • MariaDB
  • MongoDB
  • Monitoring Tools
  • MySQL
  • Network
  • Networking Commands
  • NFS
  • Nginx
  • Nodejs
  • NTP
  • Open Source
  • OpenSUSE
  • Oracle Linux
  • Package Managers
  • Pentoo
  • PHP
  • Podman
  • Postfix Mail Server
  • PostgreSQL
  • Python
  • Questions
  • RedHat
  • Redis Server
  • Rocky Linux
  • Security
  • Shell Scripting
  • SQLite
  • SSH
  • Storage
  • Suse
  • Terminals
  • Text Editors
  • Top Tools
  • Torrent Clients
  • Tutorial
  • Ubuntu
  • Udemy Courses
  • Uncategorized
  • VirtualBox
  • Virtualization
  • VMware
  • VPN
  • VSCode Editor
  • Web Browsers
  • Web Design
  • Web Hosting
  • Web Servers
  • Webmin
  • Windows
  • Windows Subsystem
  • WordPress
  • Zabbix
  • Zentyal
  • Zorin OS
Visits
  • 2
  • 566
  • 1,055,338

DesignLinux.com © All rights reserved

Go to mobile version